Greenskin Weaponsmith
| Map | Tangier High Pass |
| Flag | Leads to the Array |
| Briefing | Commander, we have located one of Rippa-Splitta's lieutenants. This lieutenant is an Ork Mek that has been supplying Rippa-Splitta's horde with heavy weapons. This Mek has made a fatal mistake, however, and has revealed his position. Find him and extract Rippa-Splitta's location from him. This is our only hope of finding the astronomic array. |
| Objectives | Locate and destroy the Ork encampments Eliminate the Ork Mek |
| Search & Destroy | Several enemy camps are located on the map |
| Bonus Intelligence | Mortar and mobile artillery troops defend this target. Enemy structures are vulnerable to missile launchers. |
| Reward | Jump Pack |
Walkthrough
This walkthrough assumes Primarch difficulty.
The mission is longish but simple and not difficult. Ork structures will produce fresh troops, but not in overwhelming numbers. You don't need to kill anything heavier than a Wartrukk, so you can focus on anti-infantry – although there are lots of buildings to blow up, so take all explosives you have if you skip the missile launcher.
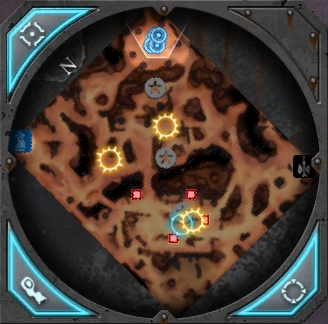
You start at the NE corner, and you can take an S-shaped path to claim one of the strategic assets and then clear the northeastern (upper) half of the map until you reach the other one. It's just regular Ork infantry, though you may be annoyed by Stormboyz, and there are quite a few turrets around. The yellow objective markers have production buildings and generators.
When you have cleared the upper half, approach the main base (the area with yellow and blue objective markers). There's are tons of minor buildings, a Teleporta Platform, a Wartrukk, the boss Mek dude, and regular infantry units. You can pick either side. Cyrus can take out a big portion of the buildings by sneaking in and remote detonation bombing them, as long as you dodge (or demo charge) any turrets in the vicinity. Wartrukks are pretty flimsy, and the Mek is easily killed with standard anti-ranged tactics. Have a melee unit tie him up while the others shoot.
There's really not much to say about this one, even though it's a big map with lots of stuff on it.

